Tag Archives: sewing

Peasant Shirt

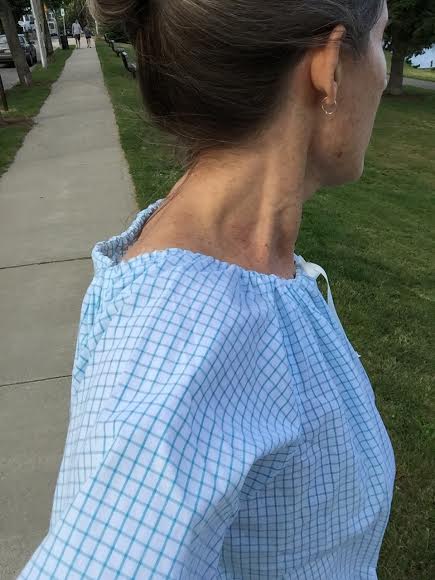
The other day I saw a how to video that I really liked. It showed me how to transform a man’s button down shirt into a peasant blouse. So I went out and bought some shirts on sale and from the thrift shop. I cut around the top, serged the edge and folded over about a half inch tunnel. I then threaded in ribbon and gathered it up.

I did realize that you must use Large or even X-Large shirts because the sleeves pull up so much and will be too tight in the armpits. You can make them short-sleeved, but wait till the end. I also cut the tails off to make the hem. You could leave them to tie in a knot or hem the bottom and put in elastic or ribbon so it’s adjustable. You could use elastic in the sleeves, too. So many possibilities!

IMG_0400IMG_0401 unnamedunnamed-2 (1)

Cashmere scarves from pullovers

Buying secondhand cashmere sweaters is a hobby of mine. Ebay is a great resource and thrift shops have some great finds. A few weeks ago I found a really nice full length tan colored cashmere skirt with the tags still on (!) at Plum right here in Beverly. Plumconsignment.com

From recycled cashmere sweaters

From recycled cashmere sweaters

IMG_0350 IMG_0349

IMG_0486 IMG_0488


I cut the pieces with the straight of grain running vertically. Then I sew the ends together to make the length I want. I have to make another length and then I sew them right sides together all the way down both sides to make a tube. I like to turn the scarf right side out and then serge the ends together and add decorative trim. The trim adds body which helps the ends lie flat against my body. I like to make the scarves long enough to go round my neck several times.

Hint: if you cut your lengths across the width of the sweater or skirt  your pieces will curl and misbehave.

Another option is to make an Infinity Scarf.

Do everything the same way until the part where you would have added the trim. Sew by hand the ends together neatly so you have a circle. See the blue and gray one in the picture. For a more professional (read persnickety) effect leave about 4″ on one side near the end open and sew the ends together with the ends right sides together. Then turn right side out through the 4″ opening and neatly hand stitch the opening closed. This makes a continuous loop to wrap around your neck a few times.

Making a man’s kilt for a woman

Basting pleatsTools for kiltLive and learn. Sew and learn. A traditional kilt fits a man because his body middle is straight. That is, ideally his waist and hips are about the same circumference. I made this kilt using You Tube vids as a guide and it was pretty straightforward. Yes, straight as in straight with no curves or darts to accommodate my curves. A woman’s waist, ideally, is a very different circumference to that of her hips. So the kilt came out perfectly. For a man. I am now in the process of gently picking out the pleats (not only pressed, but topstitched) and the nice grosgrain ribbon I used to bind the waistband. The next step will be to fit it to my body by pinning, basting, trying on, grading the pleats and maybe even putting in a dart or two. I’ll post the pics when I get it right…

Shredded sweater obsession

TO SHRED OR TO MEND- ROGUE KNITTING 

Antony Hegarty wore a shredded sweater in the Leonard Cohen documentary, “I’m Your Man”. He was singing “If It Be Your Will”. The sweater is horribly beautiful. Does that make sense to anyone else?

I found this image on Google today:

7178-tp-332_export10-035th-107

It is featured on a site called imbossy.com

Check out this cool tutorial: http://blog.boatpeopleboutique.com/projects/destroy-diy-shredded-sweater

I read today about an interesting class at a London’s Ray-Stitch haberdashery.

raystitch.co.uk

The class is an introduction to embroidery for beginners workshop taught by Celia Pym and I think it would be fascinating to take darning and mending to another level. See her work here:

celiapym.com

unnamed

I find this fascinating and by the way I have brazenly used this image without permission. You can find it on Celia’s website along with her other beautiful work.

Sailboat

Yacht? Sloop? Schooner? Ketch? Yawl? I did learn this in sailing class a long time ago, but I don’t remember much. I do have wonderful memories of sailing in 210s, Lightnings, Flying Terns and Turnabouts. We had wet sponge fights after the races and if it was really hot we dared each other to capsize our terns learning too late that the new fangled metal rudders were not secure and our dads had to hire scuba guys to retrieve them.

Sailboat applique

Sailboat applique

Some years ago I taught appliqué stitch quilting at Cranberry Quilters in South Hamilton, MA. This is an example of appliqué done with zig zag stitches on the sewing machine. IMG_3524 IMG_3522

Simple Wrap Apron

photo 2-3 photo 3 photo 4I have been looking for a pattern to make this kind of apron/pinafore for ages. I found it! I love this one and it was fun to make. I chose to line it and make it reversible, but you can make it not and it will feel lighter. See here for link to Japanese Sewing Books website with this pattern and tutorial:  http://www.japanesesewingbooks.com/?s=apron

I just discovered this neat site from Singapore. Her name is Yifarn and her blog is brilliant (and perfectly translated!)


Belt without bulk

IMG_3456This reminds me of the old days when we embroidered everything denim. I like the work on the back so much I think I’ll pick out the stitches on the front of the waistband and continue this all the way around. I love that it looks like a belt but with no extra bulk where I do not need it.

IMG_3457